Before we can do anything to the data, we need to import it into EEGLAB. EEG data can take many different formats depending on how it has been recorded and if it has been processed or not. We are going to import in ‘raw’ data, which is data that has not been processed at all since it’s recording. The data we will take in was recorded on hardware (the actual EEG recording system) made by Brain Products, the specific amplifier is called an actiCHamp plus and we recorded data from 64 electrodes placed on the scalp in a 10-20 format using an actiCAP snap headset.
How
In EEGLAB click the following menus:
-> File
  -> Import data
    -> Using EEGLAB functions and plugins
      -> From Brain Vis. Rec. .vhdr or .ahdr file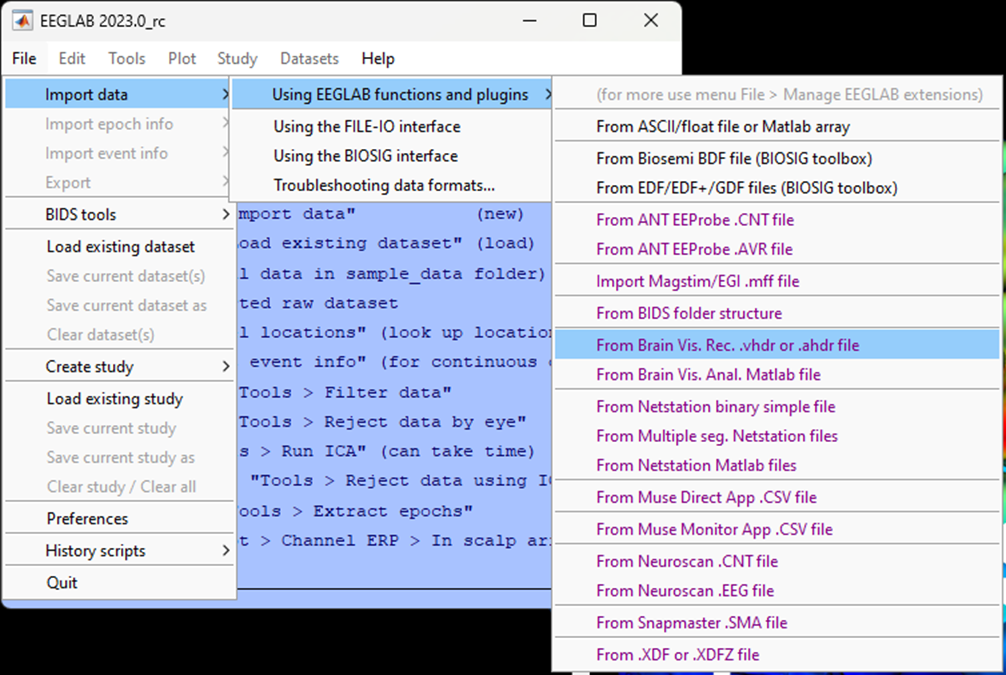
A popup menu will appear, leave the boxes blank and click Ok. The defaults here are telling EEGLAB you want to import all the data (intervals) from all the electrodes (channels).
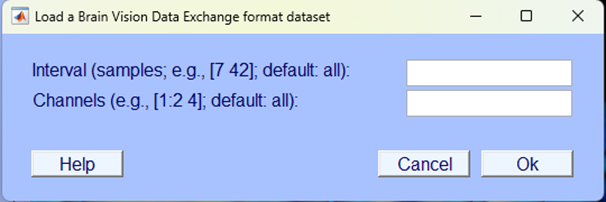
It’s easy to get confused with a lot of different terms often used for the same thing but we’ll try to help. The terms “electrodes” and “channels” are often used interchangeably and refer to a single source of electrical activity measured from one specific location.
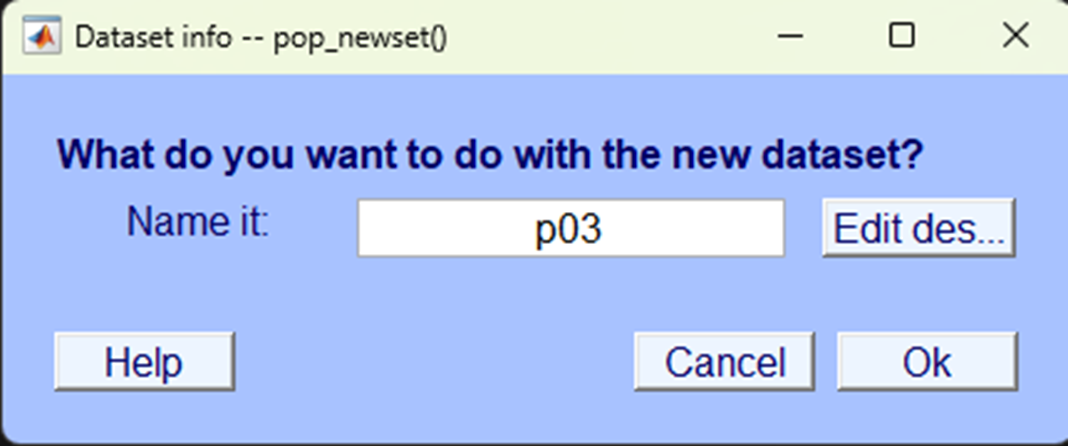
Next a pop will appear asking you what you want to do with the new dataset - make sure you Name it and select the option to Save it to file then click browse to select an appropriate directory. Use a simple naming convention, this data is from Participant 03, so we’ve called it p03 and saved it in a local directory, as shown in the figure below. When we save our data after further processing steps, we will amend our file names in a way that will allow us to identify what we’ve done to the data.
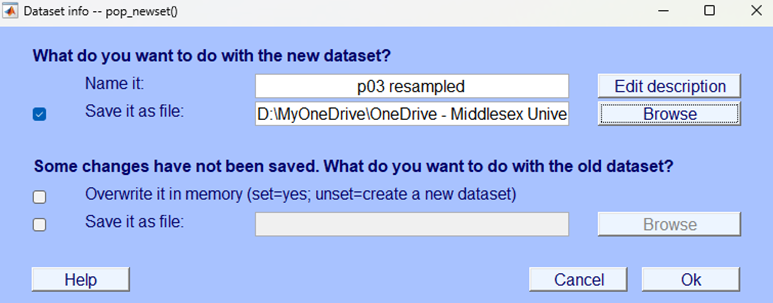
Make sure you select options that will allow you to save your work.
We strongly recommend saving your data after every step of the analysis - this will mean that if you later encounter an issue with your analysis, it will be easy enough for you to pick up from an earlier point and not have to restart all over again. You should use your own labelling system so that you can easily identify each file and the processing that has been done to it.
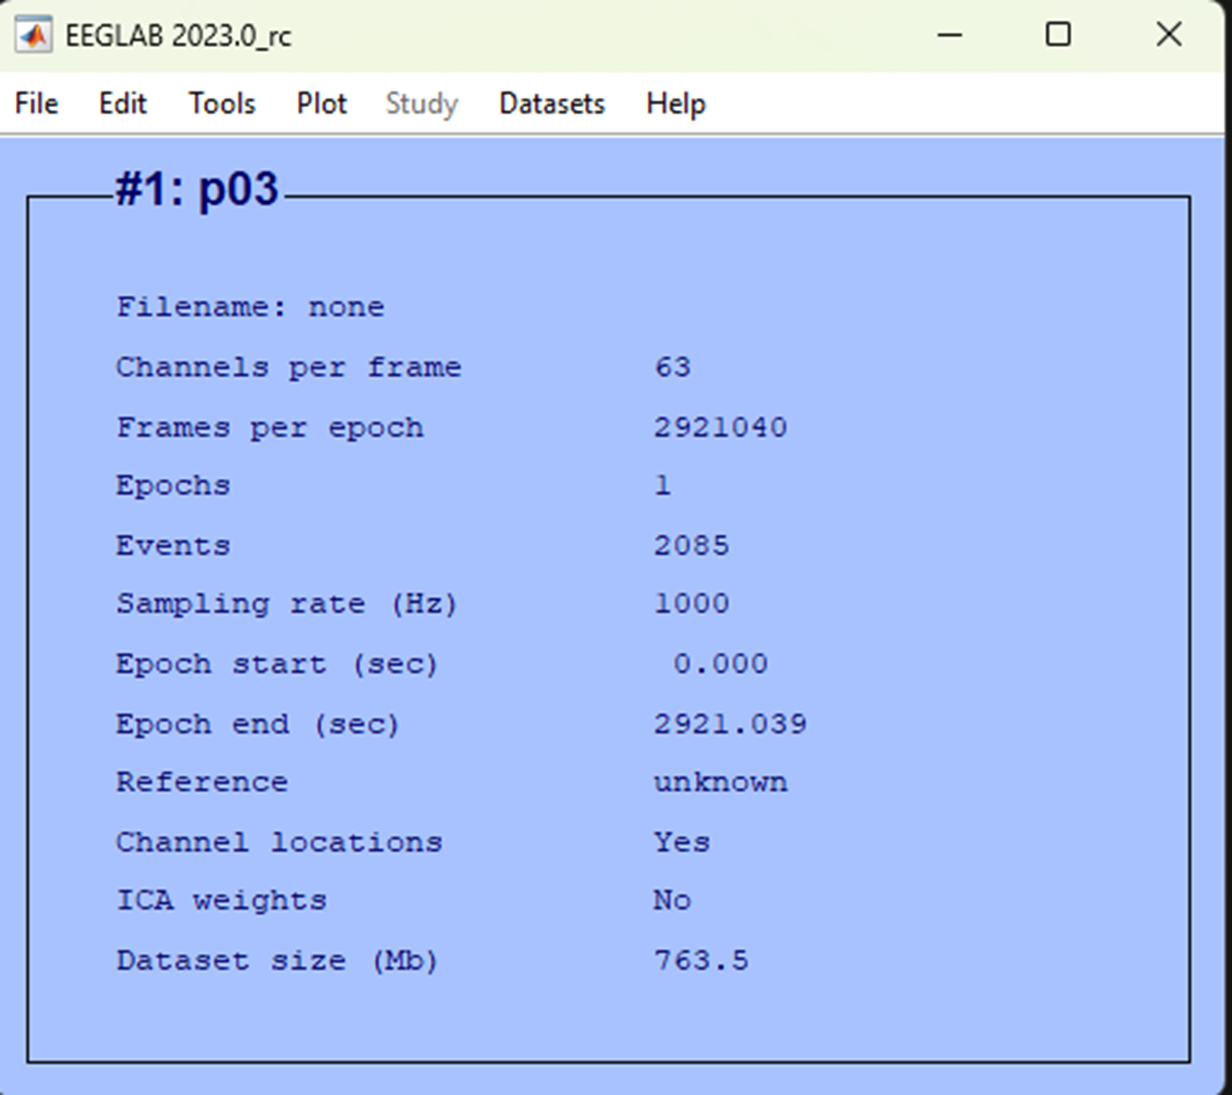
After you’ve clicked Ok navigate back to the EEGLAB home window - this window contains useful information about your current dataset. Look through what information is displayed on the current home window. You won’t understand all of what is currently displayed here but as you progress through this tutorial you should be able to learn more about what this information means. Furthermore, the home window will be a useful way to check that the processing steps have been correctly applied to the data.
You will see a different dialogue box if this isn’t the first time you’ve imported the dataset, like below. This is nothing to worry about, name the file and click Ok to continue.
Test yourself
Question 1 | What is the sample rate for the data you’ve just imported?
Question 2 | What is the unit of the sample rate?
Question 3 | What is the sample rate?